Showing a person 2, three or four instances on an unmarried photograph is one of the exceptional-regarded image hints and in the long run pretty simple to obtain. As you may see, a massive part of the fulfillment of this photomontage might be played inside the capturing.
But, before going to the heart of the problem, I need to reassure you right away, the photo that serves as an instance is not meant to flatter my ego or to present a part of my dresser.
This academic may also assist you to familiarize yourself with the management of layers. And, as I am in a great mood nowadays, we will then go a bit further with a very thrilling function in image modifying: fusion masks.
But before setting yourself in the front of your display screen, you need to take the snapshots…
The shooting
You have probably understood or guessed, the photomontage which illustrates this academic is made from 4 pics taken personally (one according to character gift) and superimposed one on the pinnacle of the alternative.
For the final effect to be convincing, the pix that make up the photomontage must be the same (with of path the best difference, of humans posing in various places). Indeed, how to achieve this sort of picture if a few pics are lighter or darker, if others are not sharp within the equal place or if the framing differs between snapshots?
There is consequently only one way to create the photographs that will integrate perfectly with each other: a strictly equal framing and a shooting completely in guide mode. For this purpose, banish if you may access-degree compacts or smartphones and preferably use a completely detachable digital camera (i.E. With the settings P, A, S, M).
To shoot, do the following:
Start utilizing solving the digital camera on a tripod or, failing that, on stationary aid (it is to hold the same framing among images…).
Put your lens in a wide-attitude function then decide the framing of your photo in addition to the places wherein you'll roll yourself on the picture. Choosing a wide-attitude framing gives two benefits: you have extra room to multiply yourself at the picture and this permits you to advantage from a more region of sharpness (that is a constant in the image: the wider the frame, the extra the area of sharpness will increase).
Switch to guide adjustment (mode M) then near your aperture around 7.1. This will let you have a fairly big region of sharpness. Now determine your pace for a very good exposure.
Focus after which launch the autofocus from your lens (M or MF function). If you do not try this, the digital camera may also re-cognizance when you take the second picture, ensuing in images with extraordinary areas of sharpness.
Adjust the ISO sensitivity with the aid of ideally choosing a low value (100 to 400) to have an exceptional possible image quality.
Use a far off cause. This will ensure that you do now not circulate the device among sockets. The best is in this example of having a wi-fi cause to avoid you walking to installation earlier than the quit of the countdown (until every other individual guarantee the taking pictures of a path).
Finally take all of the pix. Do greater poses than what you intend to put at the photo montage. You'll type it out later.
Well, now that the images are within the field, we can move directly to the second one step…
The assembly of photographs
The precept is as follows: the snapshots will be superimposed one on top of the alternative. The areas where the clones ought to be positioned will then be "erased" inside the picture above to reveal what is within the image beneath, specifically you. To perform this operation, you should, consequently, as introduced above, use software that manages the layers.
Note: the pointers and screenshots that illustrate this academic are all from the free software The Gimp. If you desire, you could view the video educational which affords the approach with Photoshop Elements software.
As introduced at the start of the thing, I provide 2 techniques of recognition
Technique # 1: Use the Eraser
It is the simplest technique and everybody can follow it. If you are just starting with photo editing, it is prime to choose this solution. I ought to point out, but, that it is vital to have understood the principle of layers as a way to carry out this academic. The method, consequently, is composed in the use of the eraser device and in erasing the zones which mask the gift of the human being at the layers below.
Start via sorting the images you will use after which open the one so one can be the first of them.
Go to File Open as layers ... Then pick out the second one photograph. Your photograph now has layers.
Repeat this manipulation for all the following pix. You now turn out to be with a photograph that consists of one of a kind layers, all of the pictures to be used for photomontage.
Make positive your pics are perfectly aligned with every different. To achieve this, click on/click on the attention to the left of the layer (1). The decor must be flawlessly nevertheless. If not, lower the opacity of the pinnacle layer to 50% (2), click on at the circulate device then at the layer simply underneath and use the arrows in your keyboard to transport the photograph. Once the first two layers are perfectly aligned, exchange the opacity of the pinnacle layer to one hundred% then click on on the eye to cover it. Now lower the opacity of the second layer in the stack and then use the keyboard arrows again to move the 1/3 layer from above. Do this for all layers.
Now show all your layers (if you have not already done so) by clicking on the attention. They at the moment are all seen and perfectly superimposed.
Click on the eraser tool (three), determine its length (four), make certain that the opacity is a hundred% to erase the whole lot (5) and select a define with blurred edges (6) to make invisible passage of the eraser.
Position yourself at the top layer (the one on the top of the stack). Make certain that the eraser's transparency effect is activated (Layer Transparency Add an alpha channel) then bypass it over the location wherein the individual is present on the layer just under (7).
Right-click on at the layer at the top of the stack then choose the Merge down alternative: the 2 layers come to be one and the brand new layer now contains the equal character two times. To add a 3rd individual, repeat steps 7 and eight and hold until there's the handiest one layer left in your photo.
Make a "Save As" of your photomontage and choose the layout of your preference.
Technique n ° 2: use the fusion masks (called layer mask in Gimp)
It is the most complicated approach however additionally the maximum sensible (cf. My article on fusion masks ). Indeed, with the preceding method, we fast surpassed the eraser over a detail that should no longer be erased. If you recognize the mistake right away, it would not count number: you cancel the remaining motion and it's OK. On the other hand, if you keep and give up your work and you comprehend the trouble when reopening the picture, you need to redo the layer that has the error. With the layer mask, you can continually pass returned to a layer to regulate the transparent or opaque areas.
As you may keep the layers, you'll be able to add/delete human beings with no end in sight.
Repeat steps 1 through 5 of the previous method.
Create a layer mask. To do this, proper-click at the photo which has to receive the mask and pick the choice "Add layer masks" then "Black (overall transparency)" within the following dialog box. A black rectangle appears to the proper of the image and its miles not visible. Repeat this operation on all layers (except the Ultimate).
We have to now make seen the human beings gift at the layers related to the layer mask. Take the “brush” tool (1) then choose the white color (2). Determine the shape of the brush (three) and its scale (four) then paint the area which has to grow to be seen again on the primary layer masks (five). What is at the layer simply below will magically appear. If you have got overflowed, no trouble: choose the black color for your brush and repaint the region you want to make transparent again.
Repeat those operations on all the layer masks so that all the humans seem.
Make a "shop as" of your document and choose the TIF or PSD extension. The advantage of this method is, of direction, to preserve a copy of your photomontage with all its layers and layer mask (see my article on "The five golden policies to respect to retouch and restore your pics" ). Once the reproduction is made, you can now visit the "Image" menu then "Flatten the photo" and store it in the layout of your preference.
Also read more,
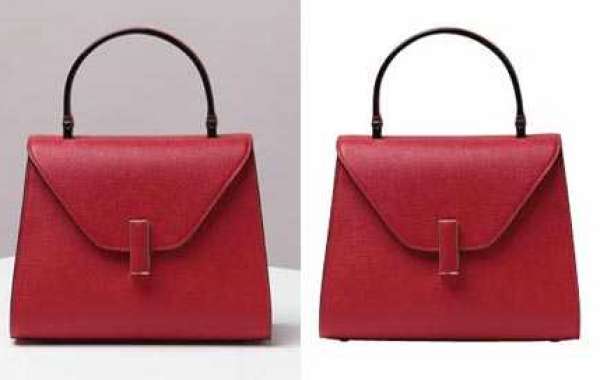
Clipping path service issuer enterprise is vital for all types of net-based employers, as a quality clipping direction service corporation we offer a low-value provider.
Tag:
# clipping path service provider company background removal service provider