You don't have to be present in drawing to create your caricatures. Photo editing software programs can now without problems deform our bodies and faces. This is what we can see in this new educational.
Caricatures are an artwork that some have mastered to perfection (see my article on the most stunning picture retouching at the net ). If like me, you aren't properly at drawing, nothing is misplaced! As you'll see, you may speedy and effortlessly acquire a very fun result.
Many software programs can create caricatures including Gimp or Photofiltre. To illustrate this tutorial, we can use Photoshop Elements.
These deformations are made viable by using the usage of the "Contraction" and "Fluidity" filters.
The “Contraction” clear-out
This could have the effect of contracting or dilating the picture in its middle.
Open the photograph to be edited, then go to the Filter Deformation Contraction… menu. Choose the cost of your choice then confirm. Your face is already nicely deformed…
I specify that the usage of this filter could be less difficult on a portrait taken on an impartial background. Indeed, the contraction or expansion that it generates distorts the complete image. The other factors found in your picture will therefore also be distorted, to not make your photo very credible.
The “Fluidity” clear-out
You can use this clear out (Filter Deformation Fluidity…) to finalize the effect of the primary clear out or pass without delay to the use of it (all of it depends on the result you want to acquire). The gear provided in this clear out is smooth to apply and you'll quickly recognize the impact of its distinct equipment.
Do no longer hesitate to play on the options of that equipment (on the proper of the screen) so one can control their vicinity of motion (thickness) as well as the importance of the impact (pressure).
If you've got long gone to a long way in the distortion effect, do no longer begin all another time. Simply take the Reconstruction device and pass it over the place to be rehabilitated.
If the deformation impact has spilled over into an unwanted location, take the Stamp device to the touch up the peripheral regions after the deformations.
Finally, recognize that it is this filter out this is used by photographers to arrive at the proper figures of the fashions that make the headlines…
Improve sharpness
The dilations or contractions inflicted at the photo bring about a lack of sharpness. This loss is proportional to the adjustments made. To restore a piece of sharpness to photocomposition visit Settings Adjust sharpness… A value between a hundred and one hundred fifty% is generally enough.
However, the strongly deformed areas might also nonetheless be a bit blurry. In this case, you'll edit the sharpness domestically the use of the Sharpness device. For lovers of non-unfavorable image modifying, do the subsequent:
Create a brand new blank layer (Layer New Layer…). Name it "Sharpness".
Take the Sharpness tool and, inside the tool alternatives container that looks at the lowest of the display screen, take a look at the Sample all layers container. If vital, regulate the energy of the tool utilizing moving the Intensity slider (the default fee of 50% is typically high-quality).
Make positive you are at the "Sharpness" layer and then flow the device over the areas to be edited. The corrections are accordingly grouped on a separate layer.
How to make an element appear in color on a black and white photograph?
Today we can see the way to do one of the oldest retouching inside the history of photography: having elements in coloration on a black and white picture. As you may see, this effect may be very easy to acquire.
The idea of mixing black and white and coloration within the equal picture likely existed because of the start of pictures. As quickly as the first pictures regarded, the photographers looked for a manner to present a touch innovative touch to the pics. Colorization, accomplished manually with a broom, was one of them. Finally, these days, we see that matters have hardly ever changed. It is continually for this motive that we realize this kind of composition. On the alternative hand, concerning production, we now use the opposite procedure: we begin with a color image that we convert almost totally into black and white.
To illustrate this situation, I chose this image, taken in Rishikesh in India. Indeed, the dominant inexperienced and the low comparison of this picture not gratifying me, I determined to play on the distinction in the color that there may be among the individual and the relaxation of the photograph.
What software to mix coloration and black and white?
Before sporting out this educational, it's far vital to make certain that your favorite software can gain this effect. From the instant that this manages the layers, you may don't forget that it's miles OK. So, earlier than going besides, you should recognize how layers paintings in photo modifying.
The principle
That's it, I'm certain, you guessed it with the aid of yourself but I tell you all the equal: you will want two variations of your image. One in black and white and the alternative in shade.
The composition, therefore, accommodates in all and for 2 layers: the picture in B W above and that in coloration, under. Part of the black and white photo is then erased (or hidden), which ultimately makes the colored area visible at the layer underneath.
Realization of the impact
Okay, now which you recognize how this photomontage might be composed, allow's pass on to its awareness…
I specify, before starting, that the software used to demonstrate this educational is Photoshop Elements.
Convert the image to black and white
The first factor to do (after having opened the photograph to edit) is to create the black and white model of the photograph.
Start by way of duplicating the layer together with your image (Layer / New / Layer by way of copy).
Convert the picture above to black and white. Be aware that Photoshop Elements offers several opportunities and that the very last result will, of direction, rely on the technique used. In this example, I chose to apply the Convert to black and white feature (Settings / Convert to black and white…) and took the “Portrait” placing. To discover what the alternative methods are, read the article which affords the four approaches to transform a picture into black and white.
Name this layer "Black and White".
You need to, therefore, at the end of this primary step arrive at a result like this:
Reveal the shade on the selected location
Good news, you've got already reached half of the fulfillment. All you have to do is carry up the coloration…
From there, there are two techniques:
Clear the area at the black and white layer
It is the fastest and easiest strategy to recognize. Take the Eraser device, pick an outline with blurred edges then skip it over the desired vicinity. The shades appear right now.
Hide the location at the black and white layer
This answer is more flexible than the first approach due to the fact the adjustments made to the image are reversible. It uses a fusion mask.
Add a layer masks to the black and white photo (Layer / Layer mask / Make the whole lot seem).
Take the brush device, pick out the black coloration then determine the thickness of the road through proper-clicking at the photo.
Position yourself on the fusion mask (the white rectangle to the proper of your black and white photo) and bypass your brush over the area you want to appear in coloration. If you overflow, it does no longer rely on: select the white coloration then pass the comb once more over the place which must no longer appear in color (this is the gain of this technique).
3- attenuate the colorimetric effect
In this example, I opted to lower the intensity of the colors. These are certainly a bit too present for my taste and all of sudden, the impact is a bit too violent. If that is also the case in your snapshots, follow those steps:
Duplicate the black and white picture (Layer / Duplicate layer ...) then position this new layer at the bottom of the stack (by way of drag and drop). Do not neglect to do away with the padlock from the background photo (with the aid of double-clicking on it) in any other case, you'll no longer be capable of trying this.
Go to the layer containing the coloration image then lower its opacity.
And now, the enhancing of this image is finished. You simply ought to watch this video to perfect your knowledge of this tutorial.
For besides…
You can play with the blending modes among the exceptional layers and get consequences that can be interesting.
Increase or decrease the assessment of the black and white layer and you may notably change the atmosphere of your picture.
Also read more,
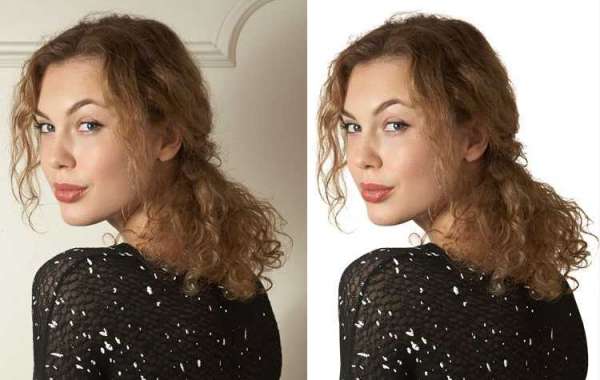
We give advance Photoshop image masking administration for complex hair, hide picture foundation expulsion. Beginning value of $0.40/picture. Get Quote for Next venture.
Tag: